Below article describes how to run wireshark capture on a windows PC for a whole day by dividing the capture files in equal sizes in a zip file and save them in a particular folder in the background without user intervention
Use case:
Disconnection to internet happens on the user PC at random intervals
Specific application gets disconnected at a random time in a day
Step 1: Open Wireshark and click Capture > Options

Step 2: Goto Input > Select ctrl + Local Area connection* + WIFI. This will capture both traffic on both WIFI and LAN (VPN)
There will be multiple Local Area connection interface, you have to select the Local area connection interface which shows heartbeat under "Traffic" tab
In the below example "Local Area connection*7" and "Wi-Fi"
Also "uncheck" promiscuous option for those interfaces individually

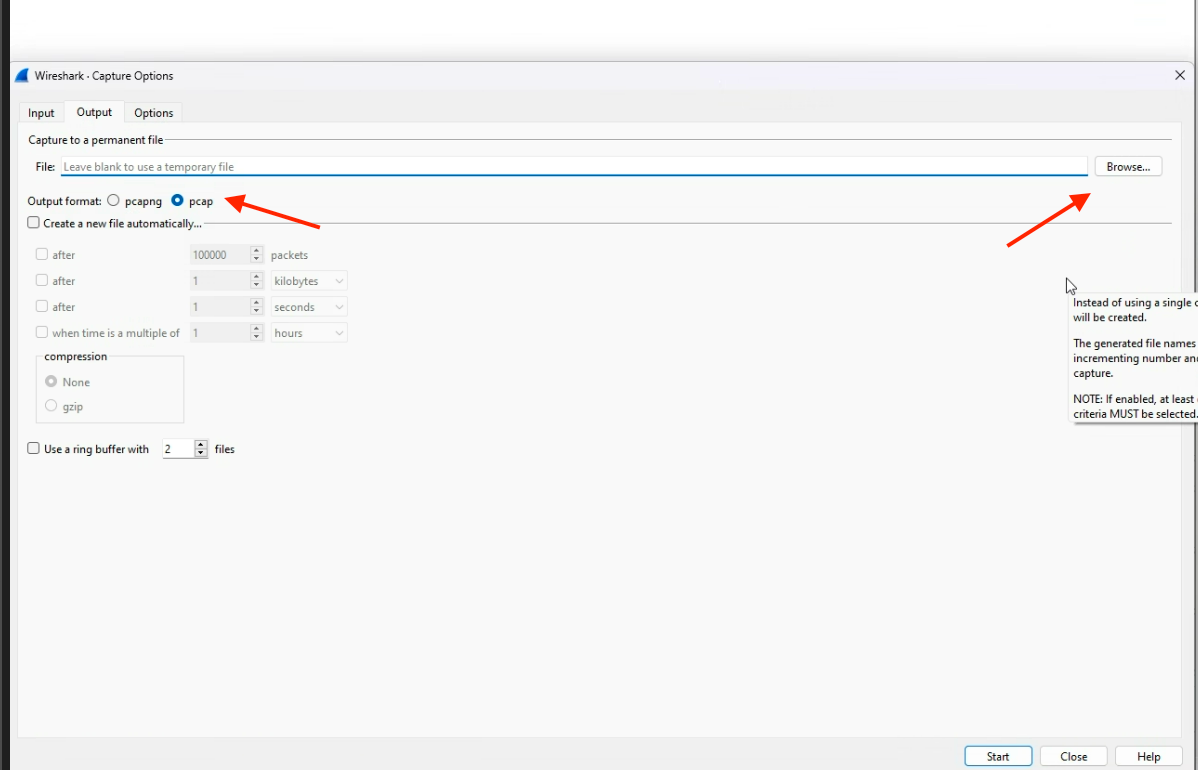
Step 3: Goto "Output" tab then select 'pcap' and click "Browse" choose folder

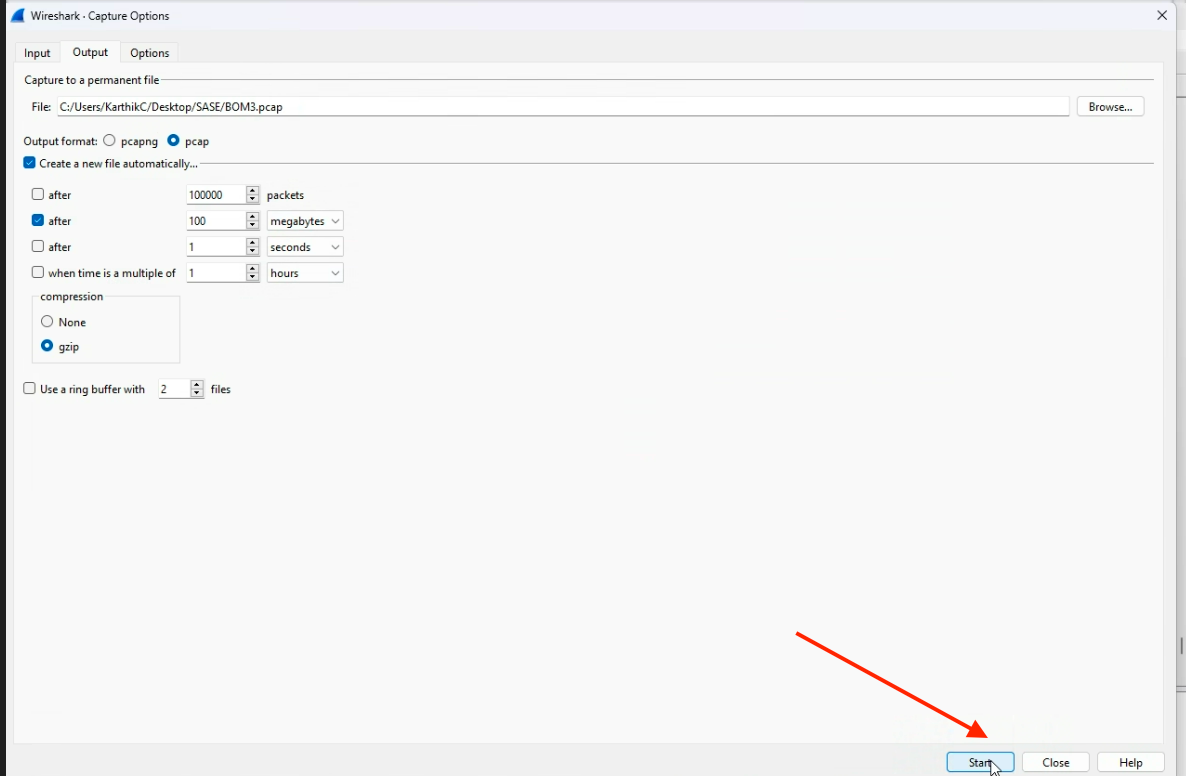
Step 4: Give the file name as xyz.pcap

Step 5: On the same "Output" tab
Click "Create a new file automatically"
Click " After" and then input "100" next to Megabytes
Click "gzip" under compression

Step 6: Click "Start". This will start capturing the packets

After step 6, pcap files will be created on the above location and when the pcap hits 100M size the file gets rolled over into a zip file.
For e.g
If the pcap is initiated to capture random disconnection, user can stop the pcap when the disconnection happens and goto the location where the pcap files files are saved. In this place, you can discard the pcap files in zip format as they are old and just collect the file in .pcap which is the latest file that has recent disconnection
